
Read time: 4 minutes
Today I’ll show you how to use middleware in ASP.NET Core to perform additional work before and after your application handles incoming requests.
There are many tasks that are not related to your application business logic, yet they are very important and must execute every time your application handles a request.
However, you don’t want to clutter your endpoints or controller actions with this kind of work. That would make your code harder to read and maintain.
So, what can you do? Well, that’s exactly what middleware is for.
Let’s dive in.
What is Middleware?
In the context of an ASP.NET Core application, middleware is software that’s assembled into an application pipeline to handle requests and responses.
And, in this pipeline, each component can perform work before and after the next component in the pipeline.
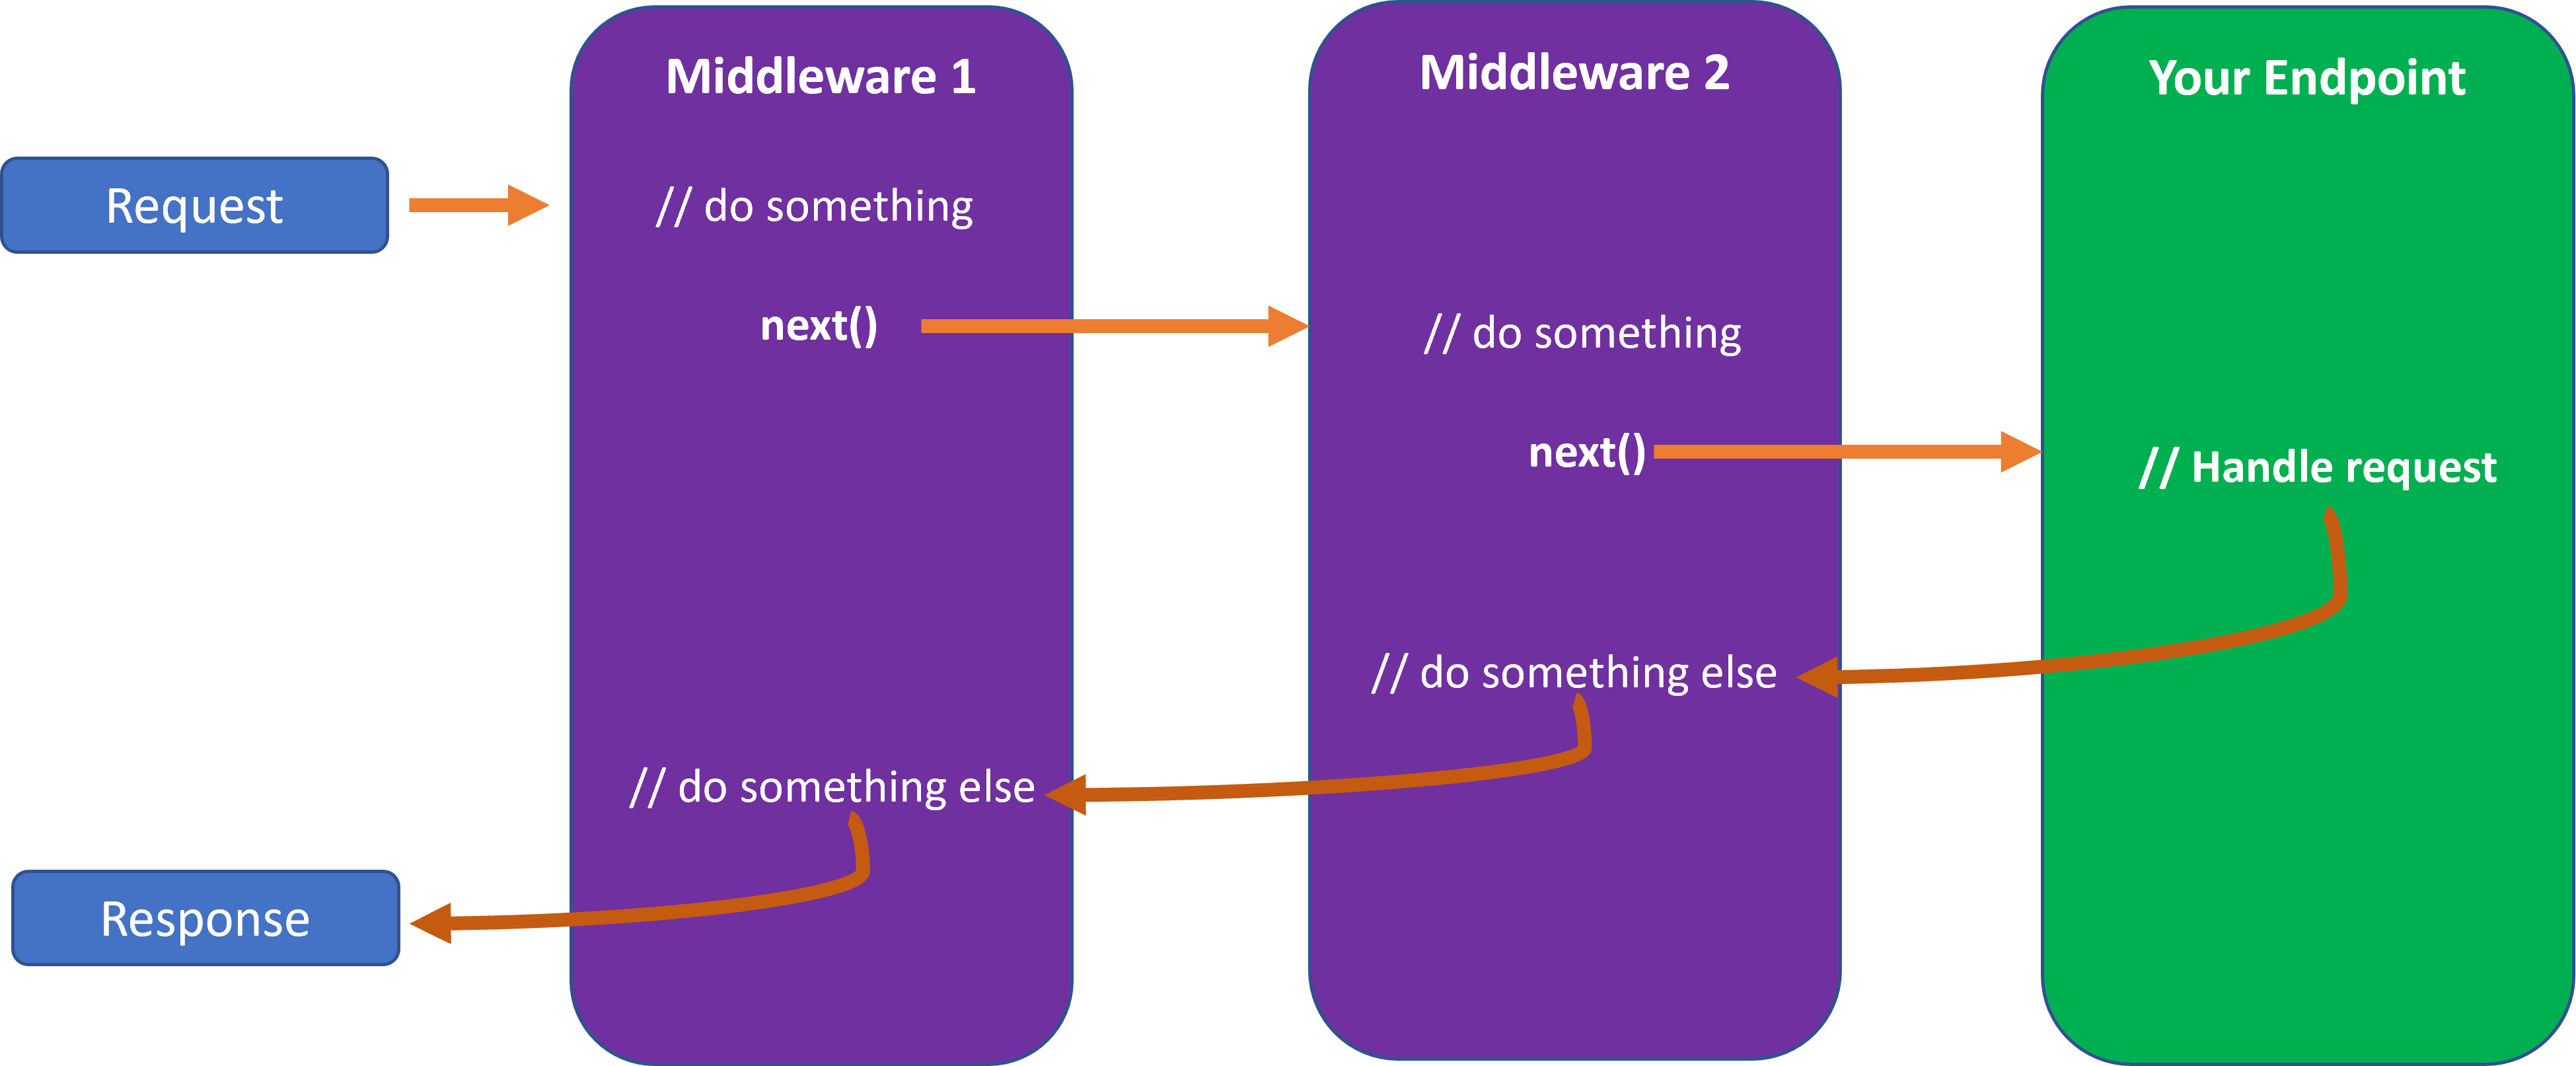
Thanks to this, you can do all sorts of work before and after any of your endpoints or controller actions handle a request.
ASP.NET Core comes with a bunch of built-in middleware components that you can use out of the box, like:
- Authentication
- Routing
- CORS
- Health checks
- Rate limiting
And many others.
But you can also create your own custom middleware components to perform any kind of work you want.
So, let’s see how to create a small middleware component that can log the time it takes to process a request.
Using a middleware delegate
Let’s start by creating a simple web application:
dotnet new web -n MiddlewareTutorial
And then slightly modify the default Program.cs code to specify a /hello endpoint:
var builder = WebApplication.CreateBuilder(args);
var app = builder.Build();

app.MapGet("/hello", () => "Hello World!");

app.Run();
Now we can implement our middleware component by using the Use method of our WebApplication instance:
app.MapGet("/hello", () => "Hello World!");

app.Use(async (context, next) =>
{
    // Start measuring the time
    var stopwatch = new Stopwatch();
    stopwatch.Start();

    // Call the next middleware component in the pipeline
    await next(context);

    // Stop measuring the time
    stopwatch.Stop();

    // Log the time it took to process the request
    app.Logger.LogInformation("{Method} {Path} request took {Milliseconds}ms to complete",
        context.Request.Method,
        context.Request.Path,
        stopwatch.ElapsedMilliseconds);
});

app.Run();
Here, after starting a stopwatch we immediately invoke the next middleware component in the pipeline by calling the next delegate.
If we did not call next, the request would never reach our /hello endpoint. That would short-circuit the pipeline.
And then, after the request has been processed, we stop the stopwatch and log the time it took to process the request.
Now run your app and send a request to the /hello endpoint.
You should see something like this in your console:
info: MiddlewareTutorial[0]
      GET /hello request took 3ms to complete
You can add as many new endpoints as you like to your app, and the request time will always get logged to the console.
Handling exceptions
The next component in the pipeline might fail and throw any kind of exception, so we should probably wrap the call to next in a try/finally block:
app.Use(async (context, next) =>
{
    var stopwatch = new Stopwatch();

    try
    {
        stopwatch.Start();
        await next(context);
    }
    finally
    {
        stopwatch.Stop();

        app.Logger.LogInformation("{Method} {Path} request took {Milliseconds}ms to complete",
            context.Request.Method,
            context.Request.Path,
            stopwatch.ElapsedMilliseconds);
    }
});
That way we will always be able to log the time it took to process the request, no matter what happens.
Using a Middleware Class
Instead of using a delegate, you can also create a class that encapsulates your middleware logic.
For instance, add this class to your project:
public class RequestTimingMiddleware
{
    private readonly RequestDelegate next;
    private readonly ILogger<RequestTimingMiddleware> logger;

    public RequestTimingMiddleware(
        RequestDelegate next,
        ILogger<RequestTimingMiddleware> logger)
    {
        this.next = next;
        this.logger = logger;
    }

    public async Task InvokeAsync(HttpContext context)
    {
        var stopWatch = new Stopwatch();

        try
        {
            stopWatch.Start();
            await next(context);
        }
        finally
        {
            stopWatch.Stop();

            logger.LogInformation(
                "{Method} {Path} request took {Milliseconds}ms to complete",
                context.Request.Method,
                context.Request.Path,
                stopWatch.ElapsedMilliseconds);
        }
    }
}
This class satisfies the 2 requirements it must meet to be able to act as a middleware component:
- It has a constructor that takes a RequestDelegate parameter.
- It has a public method called InvokeAsync that takes an HttpContext parameter and returns a Task.
You can inject more objects into the constructor if you need to, like the ILogger instance we are injecting here.
Now, go back to Program.cs and replace the previous middleware delegate code with a call to the UseMiddleware method:
app.MapGet("/hello", () => "Hello World!");

app.UseMiddleware<RequestTimingMiddleware>();

app.Run();
Run your app and send a new request to the /hello endpoint. You should see a similar log message in the console.
And there you go! You have just created your first middleware component.
Now go ahead and start creating your own middleware components to perform any kind of additional work.
And that’s it for today. I hope it was helpful.
Whenever you’re ready, there are 3 ways I can help you:
-
Building Microservices With .NET: The only .NET backend development training program that you need to become a Senior C# Backend Developer.
-
ASP.NET Core Full Stack Bundle: A carefully crafted package to kickstart your career as an ASP.NET Core Full Stack Developer, step by step.
-
Promote yourself to 15,000+ subscribers by sponsoring this newsletter.