
Read time: 4 minutes
Today I’ll show you how to enable Login and Registration in your ASP.NET Core API using the new Identity endpoints introduced in ASP.NET Core 8.0.
Most apps will need to register and authenticate users at some point, and there are many ways to do it.
And until ASP.NET Core 7 you had to either opt for the self-contained ASP.NET Core Identity system or you had to integrate with an external OIDC server.
However what many folks always wanted was a simple identity management system that:
- Could be integrated with an existing Login/Registration UI
- Could be integrated with an existing database
- Is quick and easy to setup
That is all possible with the new ASP.NET Core Identity endpoints.
Let me show you how.
What is ASP.NET Core Identity?
ASP.NET Core Identity is a membership system that adds user registration and login functionality to ASP.NET Core applications.
It’s designed to manage users, passwords, roles, claims, and more. Essentially, it provides a framework for managing everything related to the users that need to access your application securely.
Most folks integrate it with their SQL Server database via Entity Framework Core, but it also supports several other relational and NoSQL databases.
It has traditionally included all the required UI for registration, login, etc, via built-in Razor Pages, but there was not way to provide your own UI to match your application’s look and feel.
Fortunately, ASP.NET Core 8 introduced a new set of APIs that finally allow your client applications to interact with ASP.NET Core Identity without having to use the built-in UI.
Let’s see how to use them.
Add the ASP.NET Core Identity provider for EF Core
You’ll need the Microsoft.AspNetCore.Identity.EntityFrameworkCore NuGet package to use a special type of DbContext that includes all the required entities for ASP.NET Core Identity:
dotnet add package Microsoft.AspNetCore.Identity.EntityFrameworkCore
Define your user entity
As with any other entity, you need to define a class that represents the users that will be stored in your database.
You could use the built-in IdentityUser class, but it’s best to inherit from it so you can add any additional properties you might need to store for your users.
public class GameStoreUser : IdentityUser
{
}
Configure your DB context
ASP.NET Core Identity will use multiple tables in your DB to manage users, roles, and a few other things.
And, thanks to the NuGet package you just installed, you don’t have to figure out how to generate all those tables.
Define a DBContext as you usually do when using Entity Framework Core, but instead of inheriting from the standard DbContext class, inherit from IdentityDbContext, which includes all the required entities for ASP.NET Core Identity:
public class GameStoreContext(DbContextOptions<GameStoreContext> options)
    : IdentityDbContext<GameStoreUser>(options)
{
    protected override void OnModelCreating(ModelBuilder modelBuilder)
    {
        base.OnModelCreating(modelBuilder);
    }
}
Don’t forget that OnModelCreating call, which is essential to configure the schema needed for the identity framework. I forgot this once, and it took me a while to figure out why my identity tables were not being created at all.
You should also register your new DBContext in your Program.cs file:
var connString = builder.Configuration.GetConnectionString("GameStore");
builder.Services.AddSqlServer<GameStoreContext>(connString);
I’m pulling that connection string from my appsettings.json file, which points to my SQL Server Express LocalDB instance:
"ConnectionStrings": {
  "GameStore": "Server=(localdb)\\mssqllocaldb;Database=GameStore;Integrated Security=true;"
}
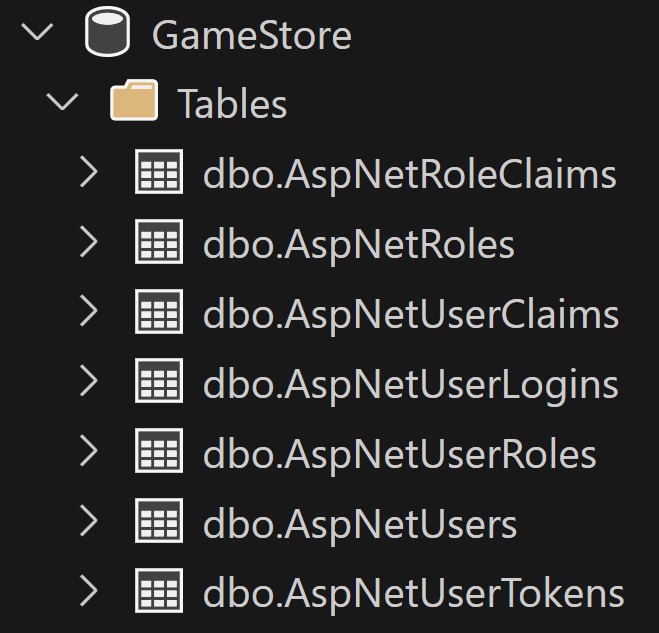
Generate your identity tables
Nothing special here. As usual, all you need to do is add a migration and update your database:
dotnet ef migrations add AddIdentity -o .\Data\Migrations
dotnet ef database update
If you explore your DB now you should see something like this:
Enable the Identity APIs
This is the easiest (and most magical) part. First, you need to register all the services required by the identity endpoints and by the Entity Framework components that integrate with ASP.NET Core Identity:
builder.Services.AddIdentityApiEndpoints<GameStoreUser>()
                .AddEntityFrameworkStores<GameStoreContext>();
And lastly, you need to add the actual identity endpoints to the pipeline:
app.MapGroup("/identity")
   .MapIdentityApi<GameStoreUser>();
I find it handy to group all the identity endpoints under a single path like /identity, but you don’t have to.
And that’s pretty much it. Your app is ready to start registering and signing in users.
Register a new user
To create a new user you can send a POST request like this:
POST http://localhost:5022/identity/register
{
  "email": "[email protected]",
  "password": "YourStrongPasswordHere"
}
Afterward, you can check your AspNetUsers table and you should see your new user there.
Login
Login is very similar. You can send a POST request like this:
POST http://localhost:5022/identity/login
{
  "email": "[email protected]",
  "password": "YourStrongPasswordHere"
}
And, when it succeeds you’ll get a response like this:
{
    "tokenType": "Bearer",
    "accessToken": "CfDJ8BmxMQ0kpohOsyc...",
    "expiresIn": 3600,
    "refreshToken": "CfDJ8BmxMQ0kpo..."
}
You can now use that token to access any of the protected endpoints in your application. Just use the accessToken value from above in the Authorization header of your requests, like this:
GET http://localhost:5022/games
Authorization: Bearer CfDJ8BmxMQ0kpohOsyc...
However, many SPA (Angular, React, etc) and Blazor WASM applications will likely want to use cookies instead of bearer tokens, since it’s safer.
For that, all you do is append the useCookies parameter to the Login request:
POST http://localhost:5022/identity/login?useCookies=true
{
  "email": "[email protected]",
  "password": "YourStrongPasswordHere"
}
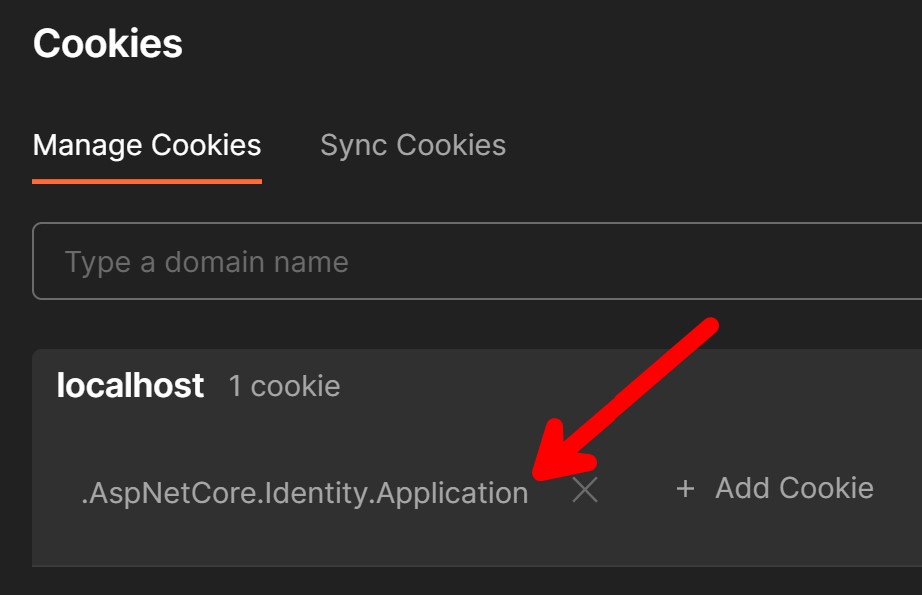
That will return a cookie that your client application can use to access the protected endpoints.
In Postman, the stored cookie looks like this:
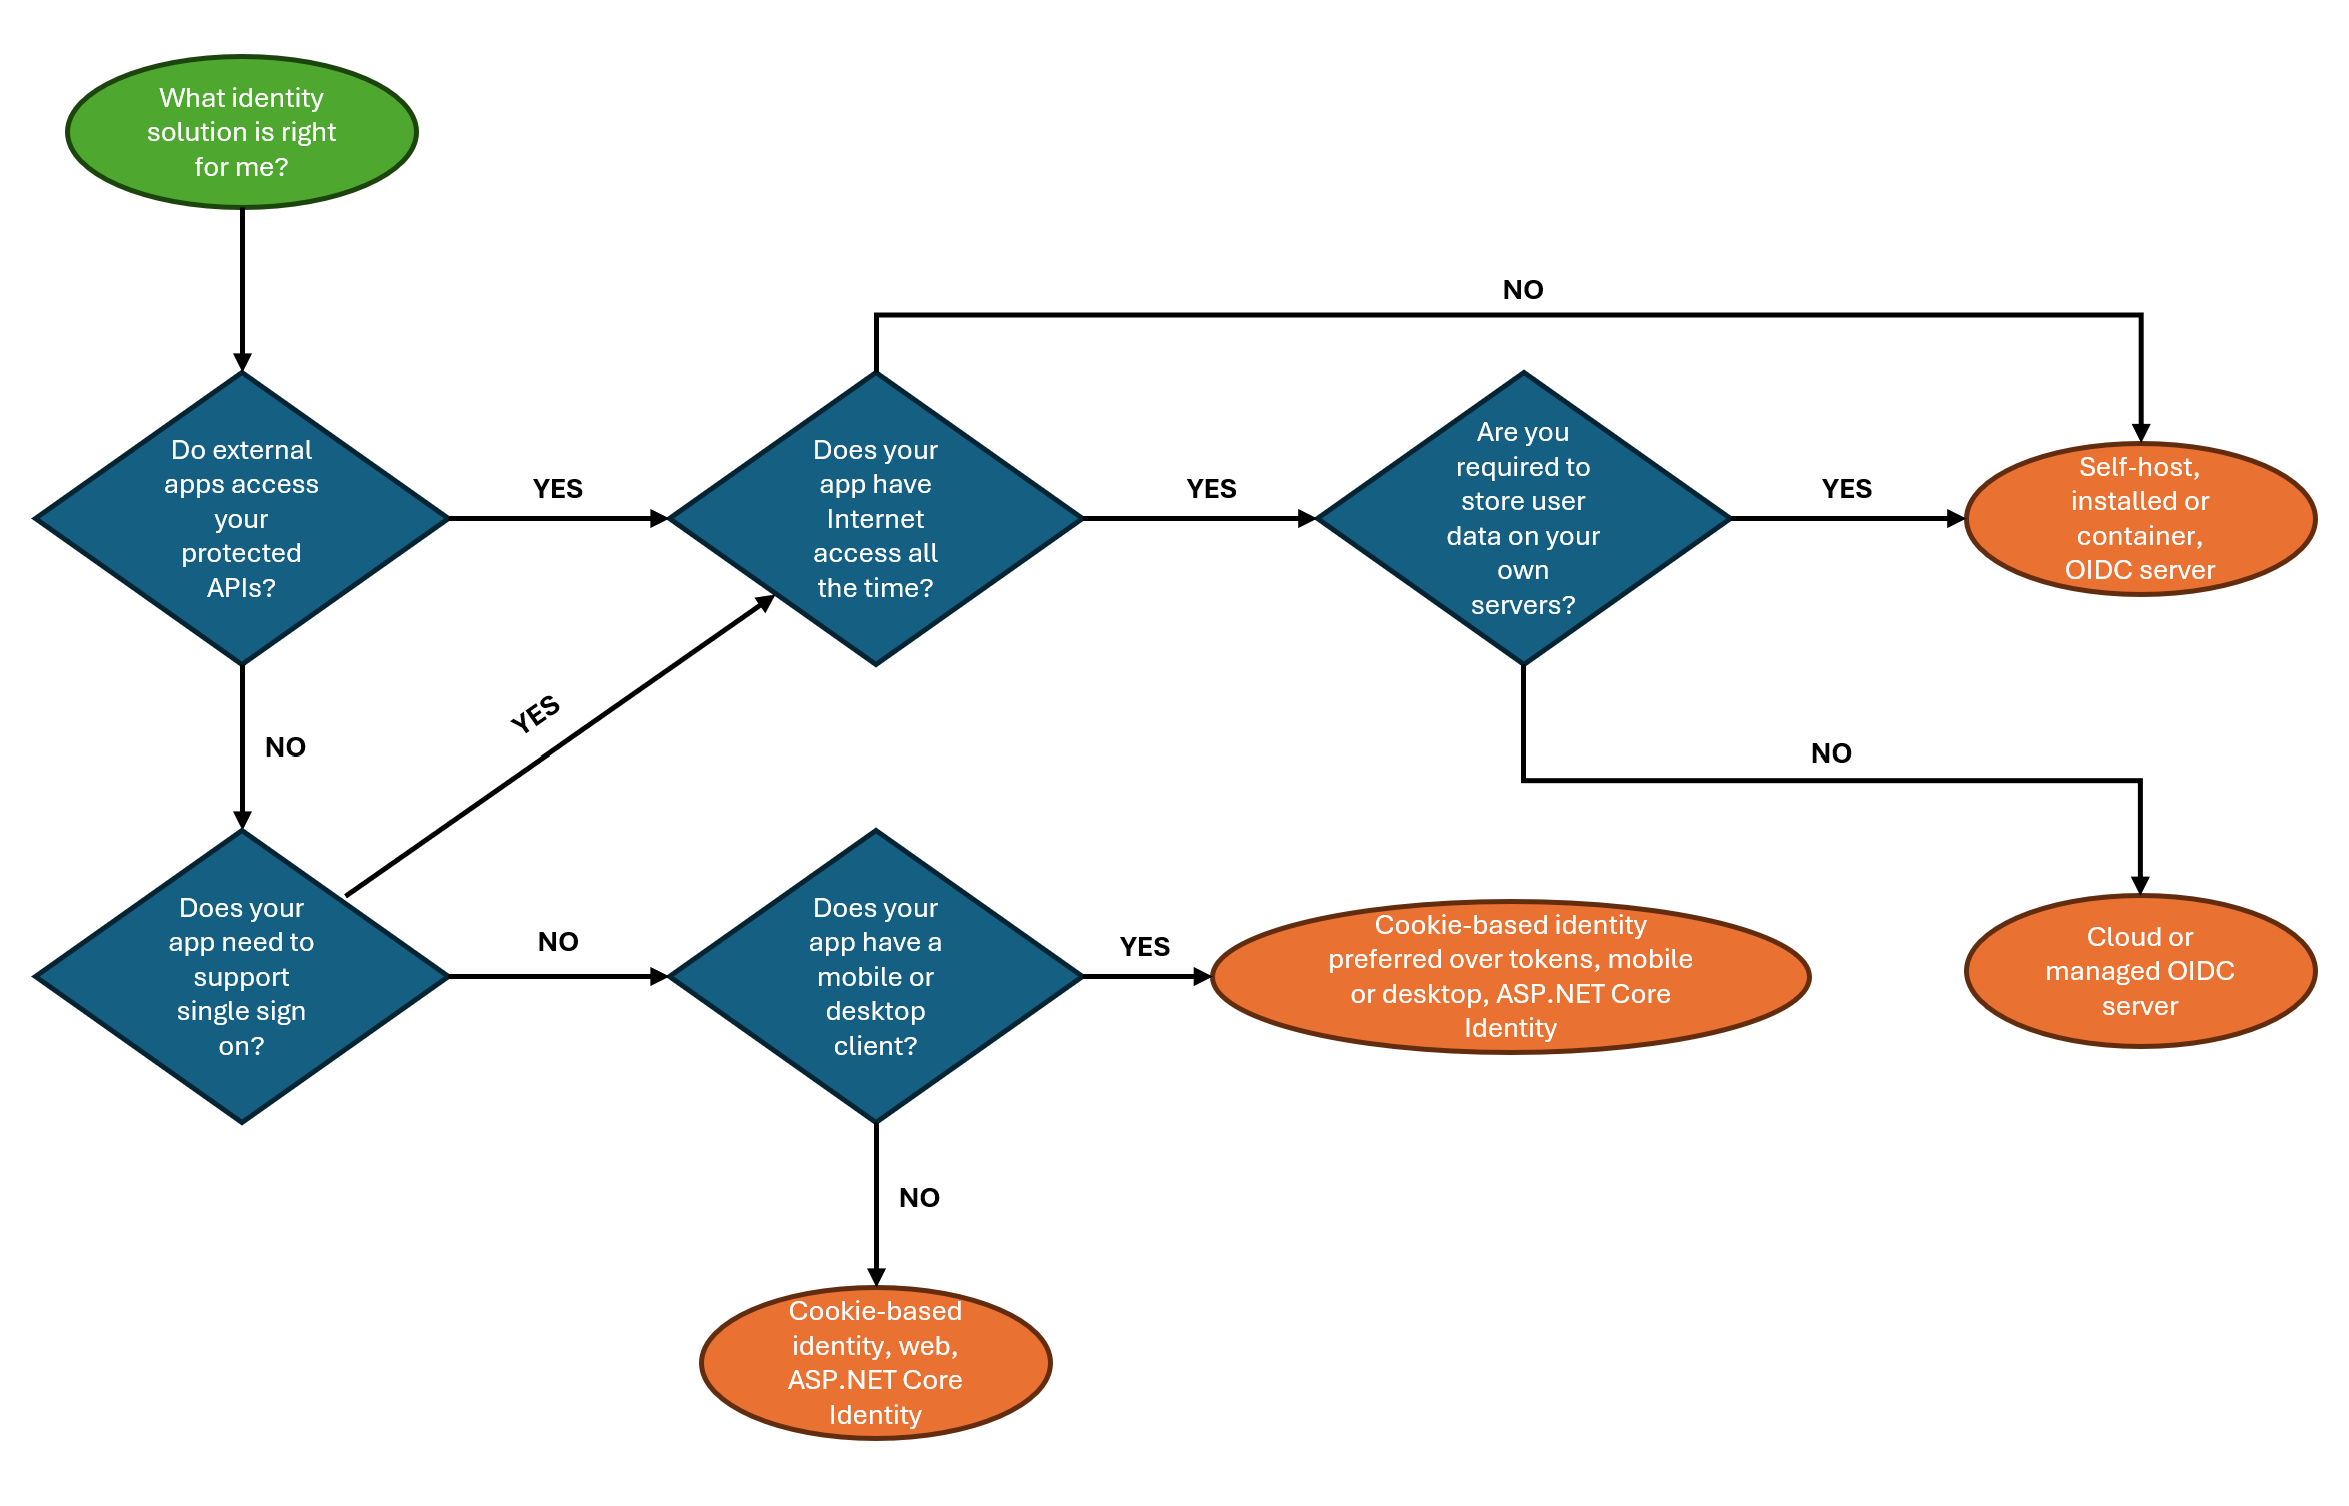
Should you use the new Identity APIs?
This is a very polemic topic since ASP.NET Core Identity lacks many features that a fully-fledged OIDC server would provide.
However, OIDC servers are not trivial to configure and, as you saw here, ASP.NET Core Identity is very easy to set up and use, if all you need is to have basic user registration and login functionality so your own clients can access your own APIs.
There’s great guidance on choosing your identity solution from Microsoft over here, but I think this diagram describes it best:
And that’s it for today.
I hope it was useful.
Whenever you’re ready, there are 3 ways I can help you:
-
Building Microservices With .NET: The only .NET backend development training program that you need to become a Senior C# Backend Developer.
-
ASP.NET Core Full Stack Bundle: A carefully crafted package to kickstart your career as an ASP.NET Core Full Stack Developer, step by step.
-
Promote yourself to 15,000+ subscribers by sponsoring this newsletter.